Creating Your First App Clip
Article originally written in brazilian portuguese. Translated by: Kayque Moraes
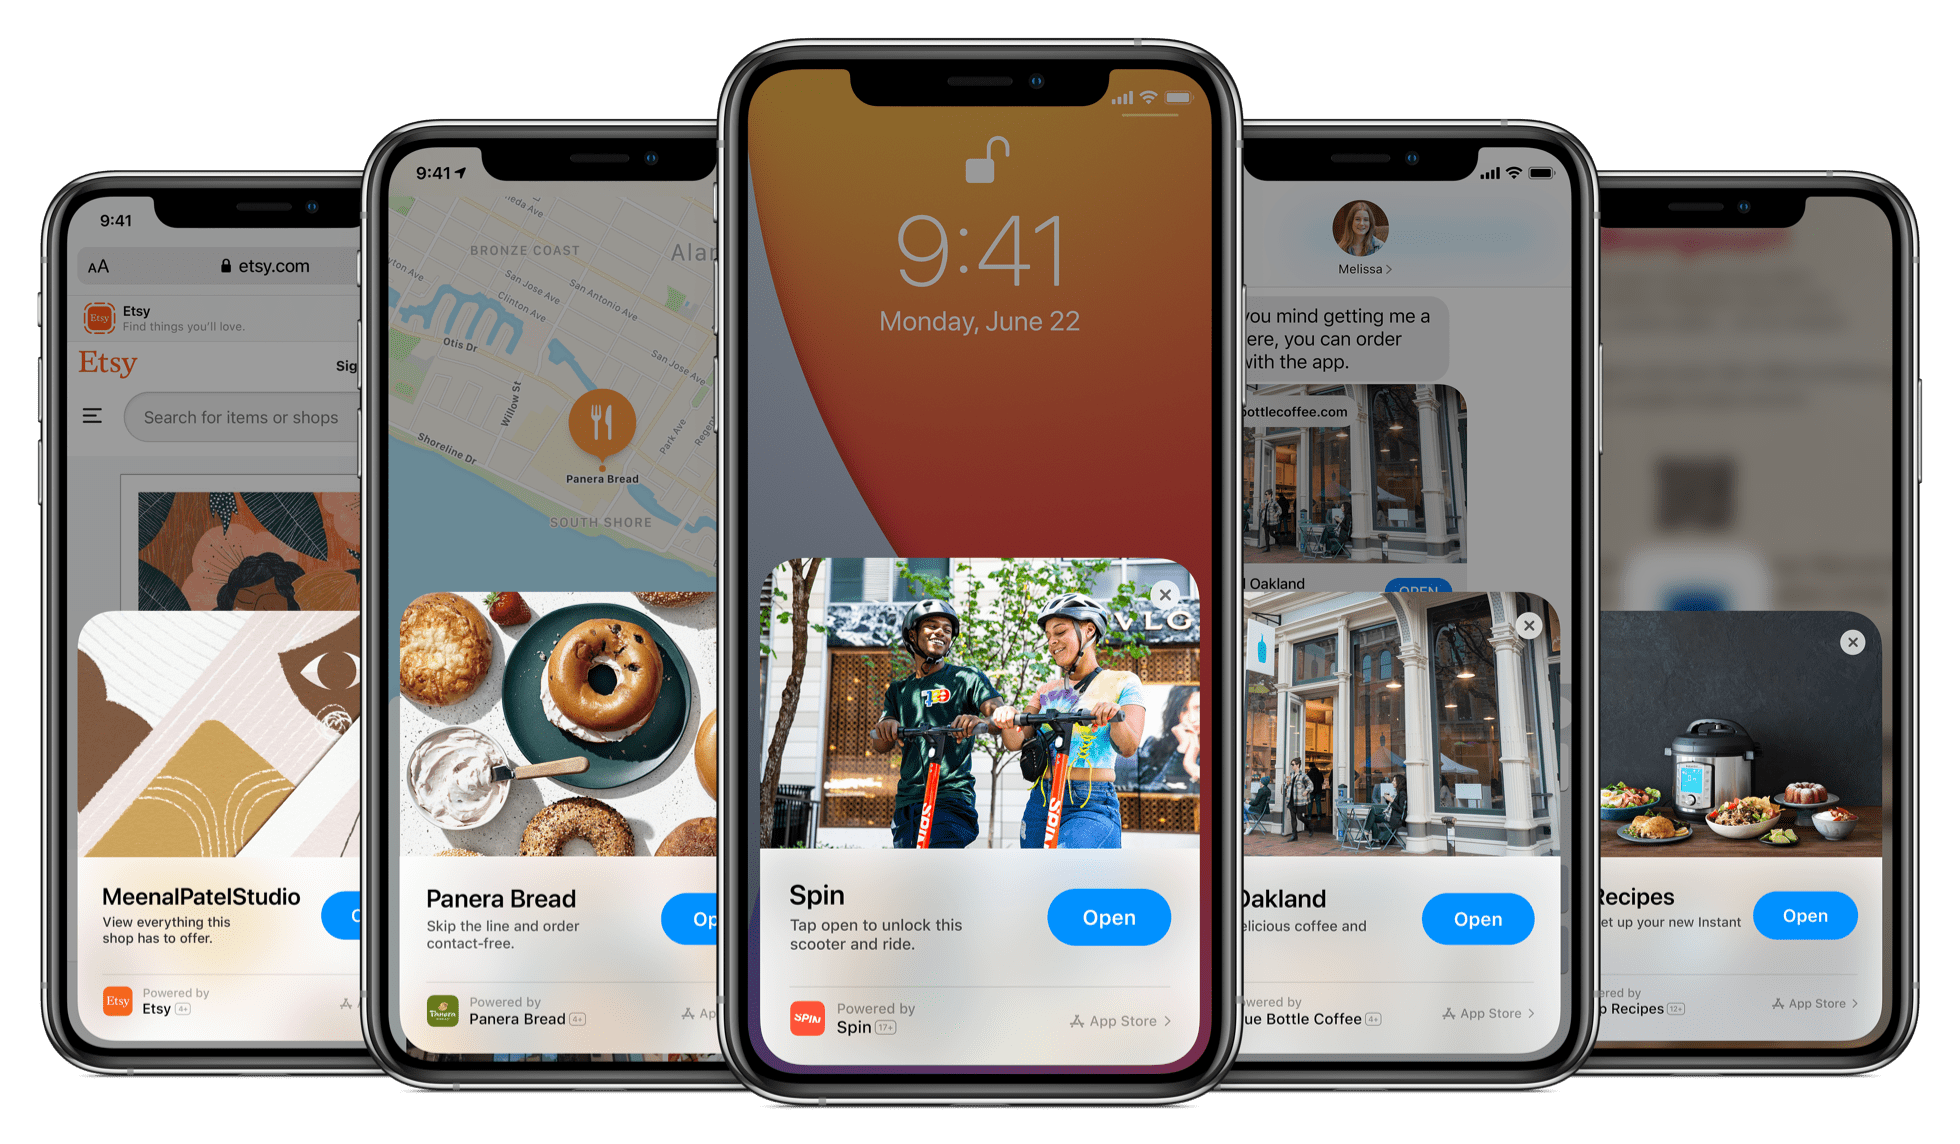
At WWDC 2020, one of the most interesting announcements that ended up being overlooked was the emergence of App Clips. App Clips are small pieces of apps that can be downloaded without the need to go through all the bureaucracy of using the App Store. They were made for quick and simple interactions, but they can be a great entry point for users to get to know your app!
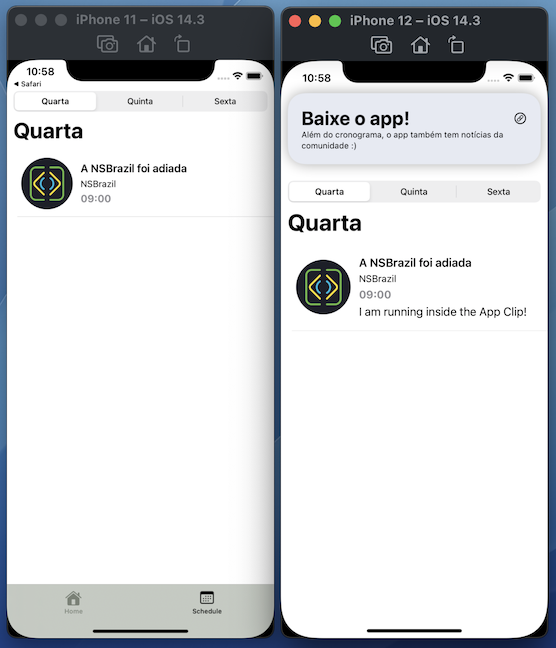
App Clips have a size limit of 10MB per clip, so it's important to carefully choose the functionality you want to present to your user! In this article, we’re going to see how it was to create the NSBrazil App Clip, which shows the event's activity schedule to the user. The key is to choose a feature that can be used instantly by the user, as the App Clip is deleted after 30 days and doesn’t become an icon on the home screen. Some interesting examples include payment flows (you can use Apple Pay to make the experience even simpler!) or a trial of some feature in your app to convince the user to install the complete experience.
Test this Clip! I bet you won’t be disappointed.
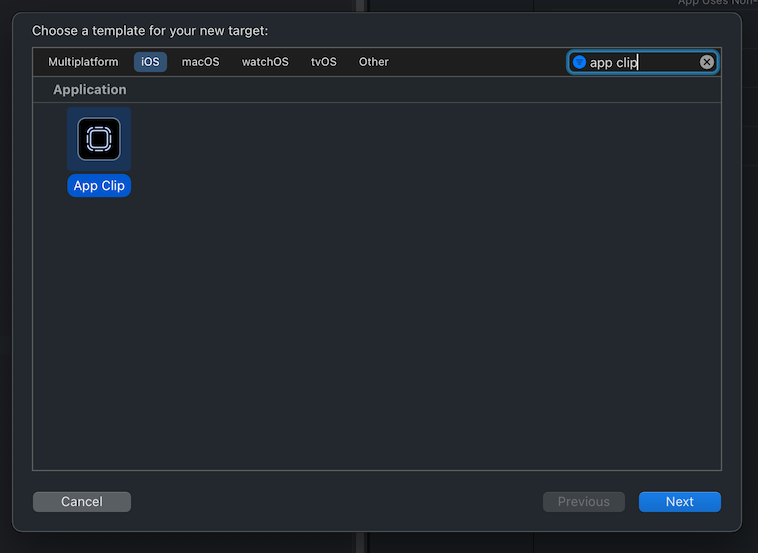
Starting from the beginning, App Clips are just like any other apps, with a few limitations. To create them, simply add a new target to your project with the desired App Clip. Since it is possible to create multiple clips per app, it’s a good idea to use a bundle identifier that represents your clip’s functionality. Don’t worry too much about this—you can create and configure others later. In the NSBrazil app, I created it as com.cocoaheads.conf.baseClip.
One of the coolest things about App Clips is that they are required to support iOS 14+, meaning we can use SwiftUI's app lifecycle instead of UIKit’s classic App/SceneDelegate. You can still use the old approach, of course, but if we can opt for a simpler process, why not?
@main
struct NSClipApp: App {
    @StateObject var feedModel = FeedViewModel()

    var body: some Scene {
        WindowGroup {
            ZStack {
                switch feedModel.isLoading {
                case .loading:
                    ActivityIndicatorView()
                case .loaded:
                    loadedBody
                case .failed:
                    errorBody
                }
            }
        }
    }

    var loadedBody: some View {
        VStack {
            DownloadCallToAction()
                .padding(.bottom)
            ScheduleListView(viewModel: feedModel)
        }
    }

    var errorBody: some View {
        VStack(spacing: 20) {
            Text("Something went wrong")
                .font(Font.title.bold())

            Button(action: {
                self.feedModel.fetchInfo()
            }, label: {
                Text("Try Again")
            })
        }
    }
}
There are three ways to handle the Clip's code: create everything again for the Clip, mark existing files for compilation in the Clip target, or embed a framework from the main app into the Clip. Rewriting everything can lead to duplicated bugs and maintenance issues.
In NSBrazil's App Clip, there’s a View that exists only within the Clip because it wouldn’t make sense in the full app. Using frameworks allows us to reuse modularized code and create multiple Clips without worrying about compilation flags. For NSBrazil, the simplest approach was chosen—marking files for compilation in the Clip. However, the long-term goal is to move everything into a framework to maintain the app's evolution.
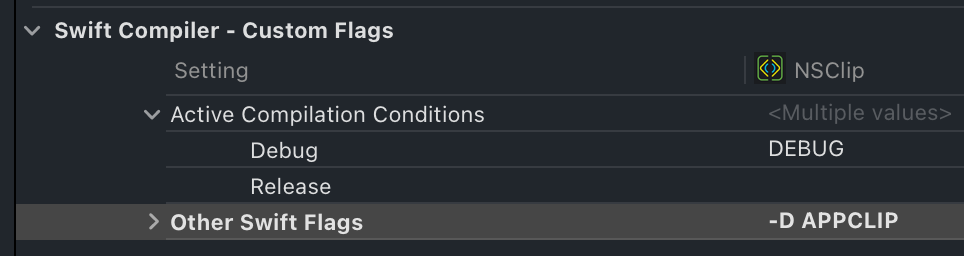
For Clip-specific code adjustments, we can use compiler flags in Swift Compiler - Custom Flags by adding -D <YOURFLAGNAME>:
VStack(alignment: .leading, spacing: 5) {
    Spacer().frame(maxHeight: 5)
    Text(feedItem.name)
        .font(.headline)
    Text(feedItem.speaker)
        .lineLimit(3)
        .font(.system(size: 14))
        .lineSpacing(4)
    Text(date())
        .font(.callout)
        .fontWeight(.bold)
        .foregroundColor(.gray)
    #if APPCLIP
        Text("I am running inside the App Clip!")
    #endif
    Spacer().frame(maxHeight: 5)
}
Testing the App Clip
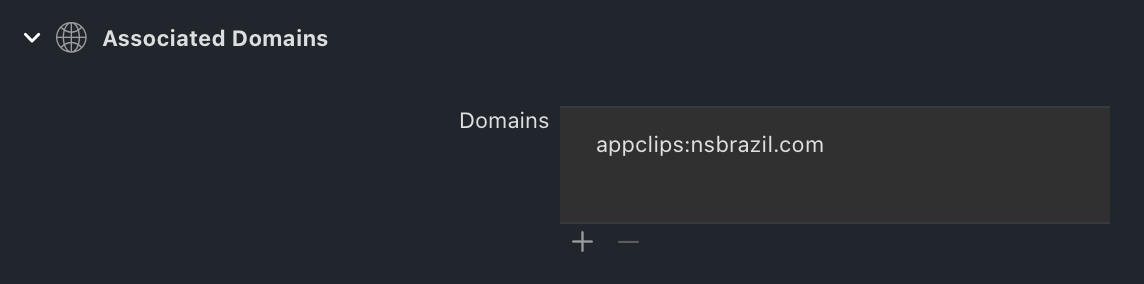
To properly test the App Clip, enable the associated domain capability:
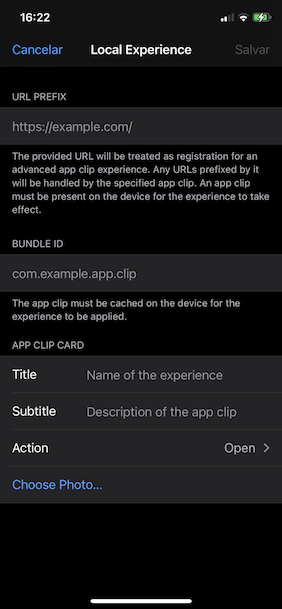
Then, create a Local Experience in Developer settings (Developer -> Local Experiences -> Register Local Experience):
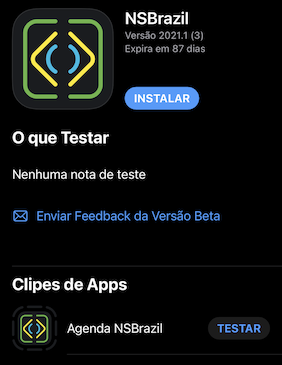
To test on other devices, archive an ad-hoc version or upload the app to TestFlight.
To check the App Clip's size, archive it for ad-hoc installations and review the App Thinning Size Report.txt. The uncompressed size for the Universal variant must be under 10MB.
{% highlight plain %} Variant: NSClip.ipa Supported variant descriptors: Universal App + On Demand Resources size: 333 KB compressed, 667 KB uncompressed App size: 333 KB compressed, 667 KB uncompressed On Demand Resources size: Zero KB compressed, Zero KB uncompressed {% endhighlight %}
Publishing the App Clip
App Clips can be accessed via NFC tags, QR Codes, website banners, App Clip codes, Apple Maps, and Siri suggestions. By setting up a URL domain, you cover all except Maps and Siri.
Add a JSON file to your server at .well-known/apple-app-site-association:
{
    "appclips": {
        "apps": [
            "TEAMIDENTIFIER.bundle.identifier.of.your.clip"
        ]
    }
}
If using GitHub Pages, CloudFlare Workers can serve the JSON:
addEventListener('fetch', event => {
  event.respondWith(handleRequest(event.request))
})

async function handleRequest(request) {
  let aasa = JSON.stringify({
    appclips: {
      apps: ["V45SL99ZK4.com.cocoaheadsbr.conf.baseClip"]
    }
  })
  return new Response(aasa, {
    headers: {
      "content-type": "application/json"
    },
    status: 200
  })
}
For easy access, create a QR Code or App Clip Code via App Store Connect or the App Clip Code Generator. You can also add a Smart App Banner:
<meta name="apple-itunes-app" content="app-id=1180455342, app-clip-bundle-id=com.cocoaheads.conf.baseClip">
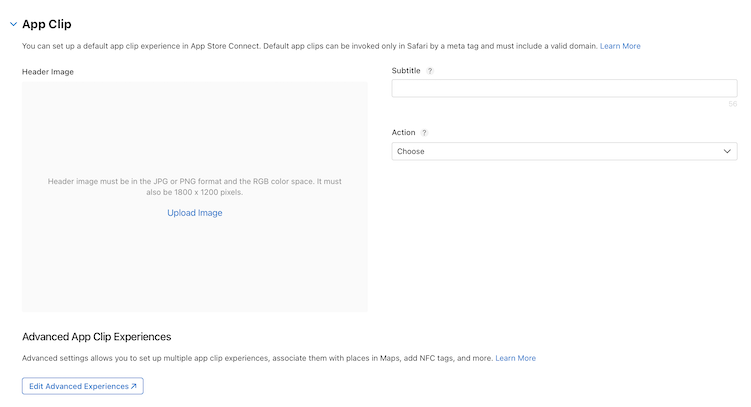
Finally, configure your App Clip experience in App Store Connect and wait up to 48 hours for propagation.
That’s it! Your App Clip is ready to be shared. Check out the full NSBrazil app on GitHub, built entirely with SwiftUI for iOS 13+!